I’ve always had a fascination with American history from the 1940’s through the 1950’s. Well, I guess it’s more that I have been captivated with the social norms and ideals of the mid-century housewife…the images of the wife waiting at the door for her husband to come home from work, his dinner and drink prepared and waiting for him, children clean and out of the way. How weird is that?
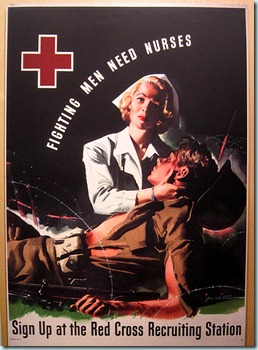
WWII posters about Rosie the Riveter, the American Red Cross, and war bonds look like artwork to me. I don’t know why…
The American Red Cross posters from that era are so interesting. (These images were taken from the American Red Cross website.)
Look at that young soldier, so happy to have a warm cup of something in the midst of war chaos.
Of course, the Red Cross is special to me because of a former schoolteacher from Massachusetts named Clara Barton who went into the battlefield to give nursing care to the wounded Civil War soldiers. She later went to Europe and learned of the Red Cross Movement and founded the American Association of the Red Cross. How’s that for an awesome nurse!
I decided to get crafty with a Red Cross
theme-like thing.
First thing that comes to my mind is a pillow with a red cross on it! Simple, right? Grrrrrrr.
Supplies
- 6 inch quilter’s square
- 16 inch pillow form
- fabric of your choice
- red paint-make sure it’s fabric paint!
- cording, if wanted
- sewing machine and supplies

I used a basic envelope closure for this one…if you are confused on how to do this, it’s better if you don’t ask me. Sewing for Dummies has a great tutorial and I would just be plagiarizing them.
Cut out your fabric 16”X16” for a 16” pillowform.
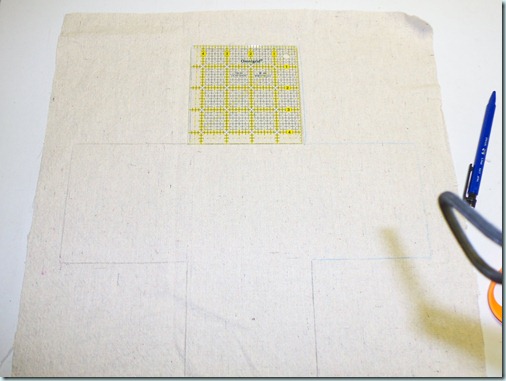
Start out by drawing your cross. Use the 6 inch quilters square as your guideline. (Of course, you don’t have to do it this way, the square just makes it easier. Believe me, I tried my hand at freestyle & it didn’t work.)
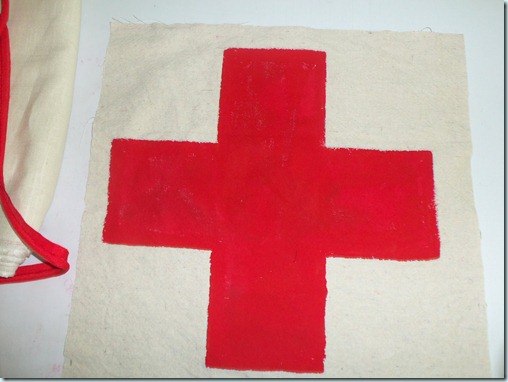
Use fabric paint to color in the cross a nice, vibrant red.
It’s time to attach the dreaded cording. I say “dreaded” because I’m not very good at it. Somehow, no matter how hard I try, it never ends up as nice as I would like it.
Anyhoo…..match up the raw edges of both the cording and the right side of your fabric. Pin that in place. ( Don’t forget to give the cording a clipping just to, not through, the seam at the corners.)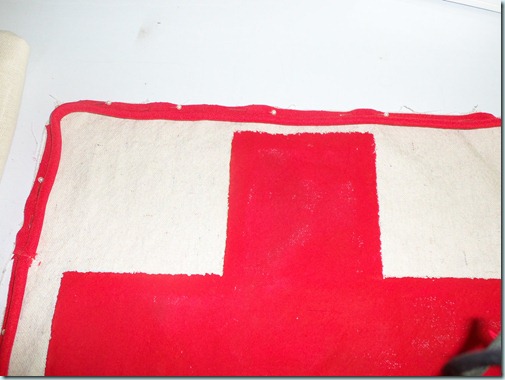
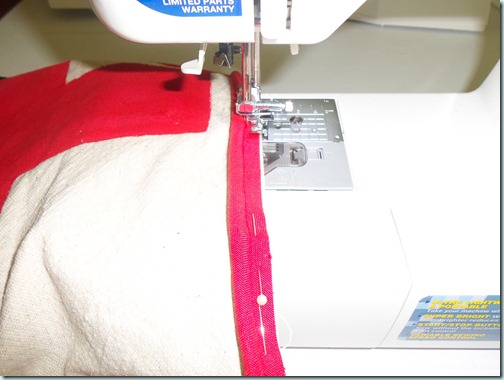
Using your zipper foot, sew on your cording.
As previously discussed, I used an envelope closure for the back of this pillow, so I attached it at this point to the front.
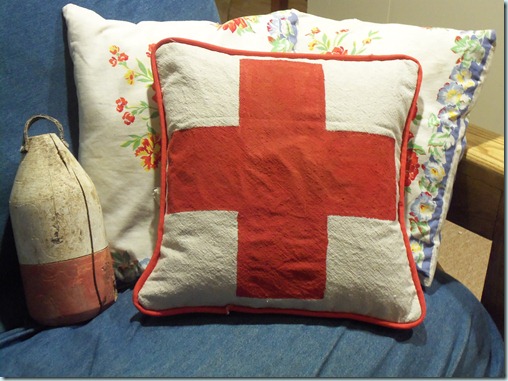
The End Result?….
Ha! To me, the end result looked nothing like a Red Cross pillow…It looks like it
should be at a Life Guard Station
on Baywatch!
Oh well…sigh…
One more thing…
use fabric paint!
I used regular old craft paint and, as you can see, it’s stiff and shiny.
