Another Curbside Find…
It’s been awhile since I posted…
Always something else that needs to be done…
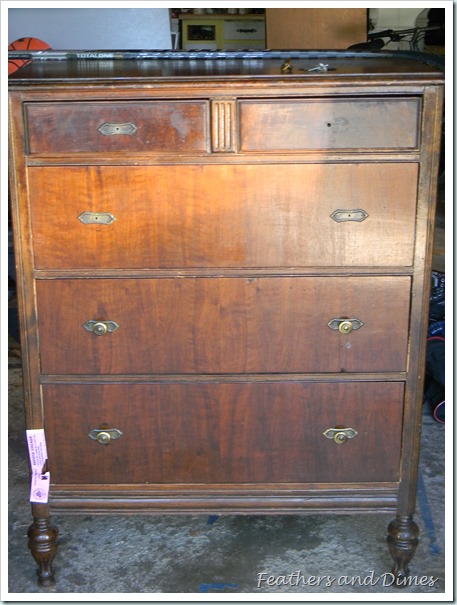
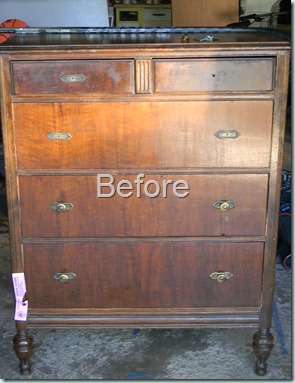
But I recently acquired a lovely dresser that was put out to pasture (sitting out by the curb, waiting for the garbage truck to load it up).
See? It still has the garbage sticker on it…
I felt the need to come to its rescue. This girl was found down the street and when my husband saw me eyeing it, he was like, “Don’t even think about it. We have enough stuff.” He’s right. We do have a lot of stuff.
So I walked away and we went about our day, dinner came and went, it got dark out, bedtime for the kiddos, reading, watching TV, catching up for the parents.
The next morning, she was still there. My husband went to work, kids went to school.
She was still there. No garbage pick-up yet.
I ran some errands, came home.
She was still there. Beckoning. Garbage pick-up is running behind schedule.
So I did what any thrifty person would do…
I located my kids’ old Radio Flyer Wagon, hanging up in the rafters of the garage. Got it down without giving myself a concussion in the process, and walked down the street with it.
Loaded up the dresser on her back into the wagon and pulled her back to my house. (I hope none of my neighbors saw me).
Perfect project to try my hand at making my own chalk paint!
To make my own chalk paint, I searched the internet for the perfect recipe and read many reviews. I loved this one from How to Distress Furniture.
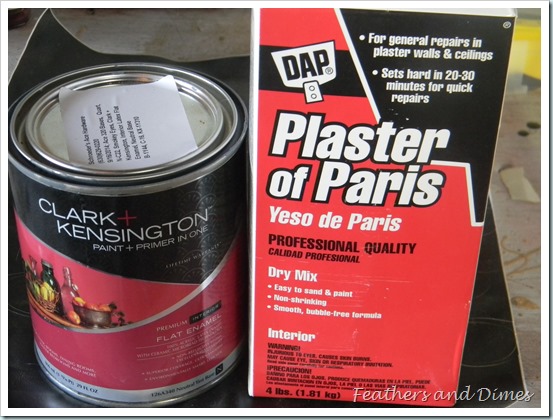
I went to my local Ace Hardware and bought some paint, Plaster of Paris, sandpaper, and got to work on her.
I sanded away all the dents and dings and surface first. And then it was time for the fun part—Painting!
The paint color I used is called “Smokey Gray” by Clark and Kensington. Mixing it with Plaster of Paris made the paint go on super smooth!
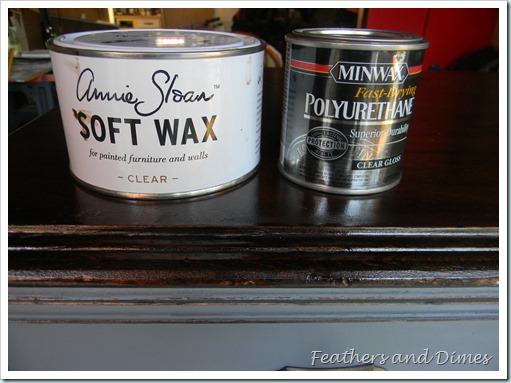
I gave her two coats of paint and then used Annie Sloan Clear Wax.
After about a day, I sandpapered again to give it a rustic, vintage look and stained the top with a couple coats of Minwax Dark Walnut. When that dried, I used Minwax Polyurethane to protect the top.
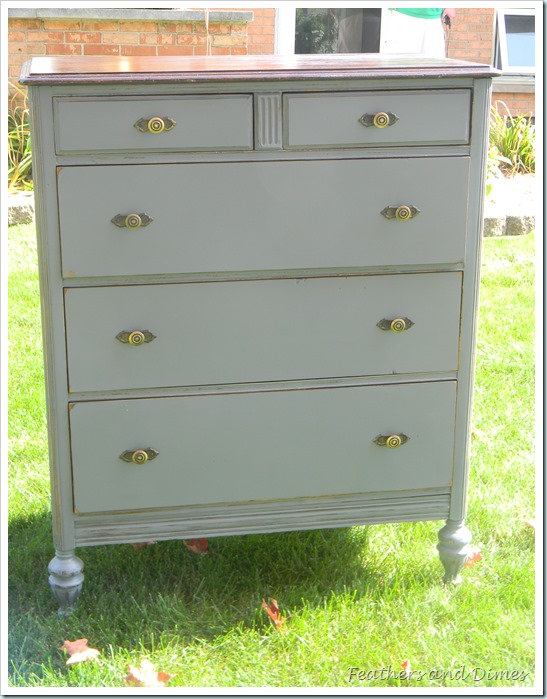
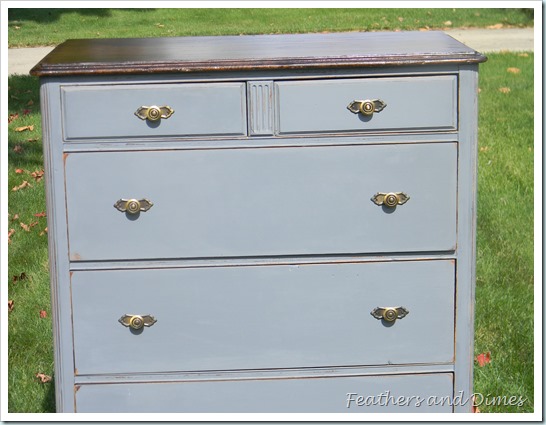
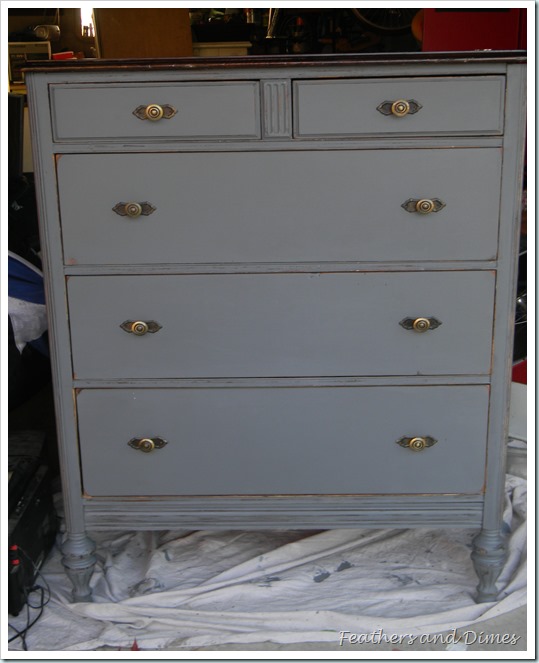
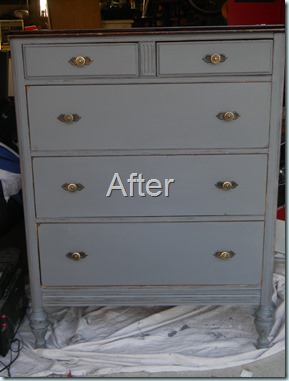
And here she is! Original Hardware and All!
Here’s a crooked shot…
In the sunlight, the paint color is blue-ish.
Indoors, the paint looks more gray.
I love how she turned out!
What do you think?
(I really need to stop taking crooked pictures)
And in the end, my husband was impressed.
Now if only I could get someone to buy this from me so I could move on to my next curbside find.
Peace,
Kathy
Linking up! Please check out these great Link-ups!


Looks good Kathy!
Thanks! Want to buy it?
Well done. Another example that I don’t know what I’m talking about most of the time. It looks great.
You always have faith in me!
I love reading your stories – I wish I could compile a book with them in it – what a great story! And just look at the results!! It’s beautiful – I would never have the creative instinct to see what you did on the curb!! Great job, Daughtercita!!
Beautiful transformation and a great story to go with!
Kelsey @ the Vintage Storehouse & Co.
PS- Would love to have you share & link up at ReLoved Fridays! The link party is open until Monday!
Thanks Kelsey! Would love to link up!
High five to you! Great transformation!
Thank you! I’ll take that high five with a smile!
It turned out beautifully! I can’t believe someone was throwing that away! I’m glad it didn’t end up in a land fill!
I’m glad it didn’t go in a landfill either! I’m glad you like it, too.
Great makeover! I think this is a beautiful piece. The paint is the PERFECT color – I love the bluefish-grayish color (depending on the light). I wish I could find something like this by the curb someday. Thanks for sharing your project.
Best,
Michelle from simplysantabarbara.blogspot.com
Keep a look out! People are always throwing away good furniture they don’t know what to do with.
Silly people…such a great piece…nice refinishing too!
Thank you Maureen! I’m glad you stopped by and liked it.
Fantastic transformation! Thanks for sharing over at ReLoved Fridays! I hope to see you next week!
Kelsey @ The Vintage Storehouse & Co.
Another great story and transformation. What are you charging for this “Kathy original?” I may know someone who is interested.
It’s gorgeous! Thank you for sharing. You are one of the features at the Make it Pretty Monday party at The Dedicated House. Here is the link to this week’s party. http://www.thededicatedhouse.com/2014/10/make-it-pretty-monday-week-117.html Hope to see you again at the bash! Toodles, Kathryn @TheDedicatedHouse
Kathryn! I am THRILLED & HONORED to be featured at Make it Pretty Monday! Thank you!
Pingback: Blogging 101 Course via WordPress | Feathers and Dimes
Pingback: Make it Pretty Monday – Week 117